ESDBEST

Static Dissipative Mats for Electronics Workbenches and ESD Control

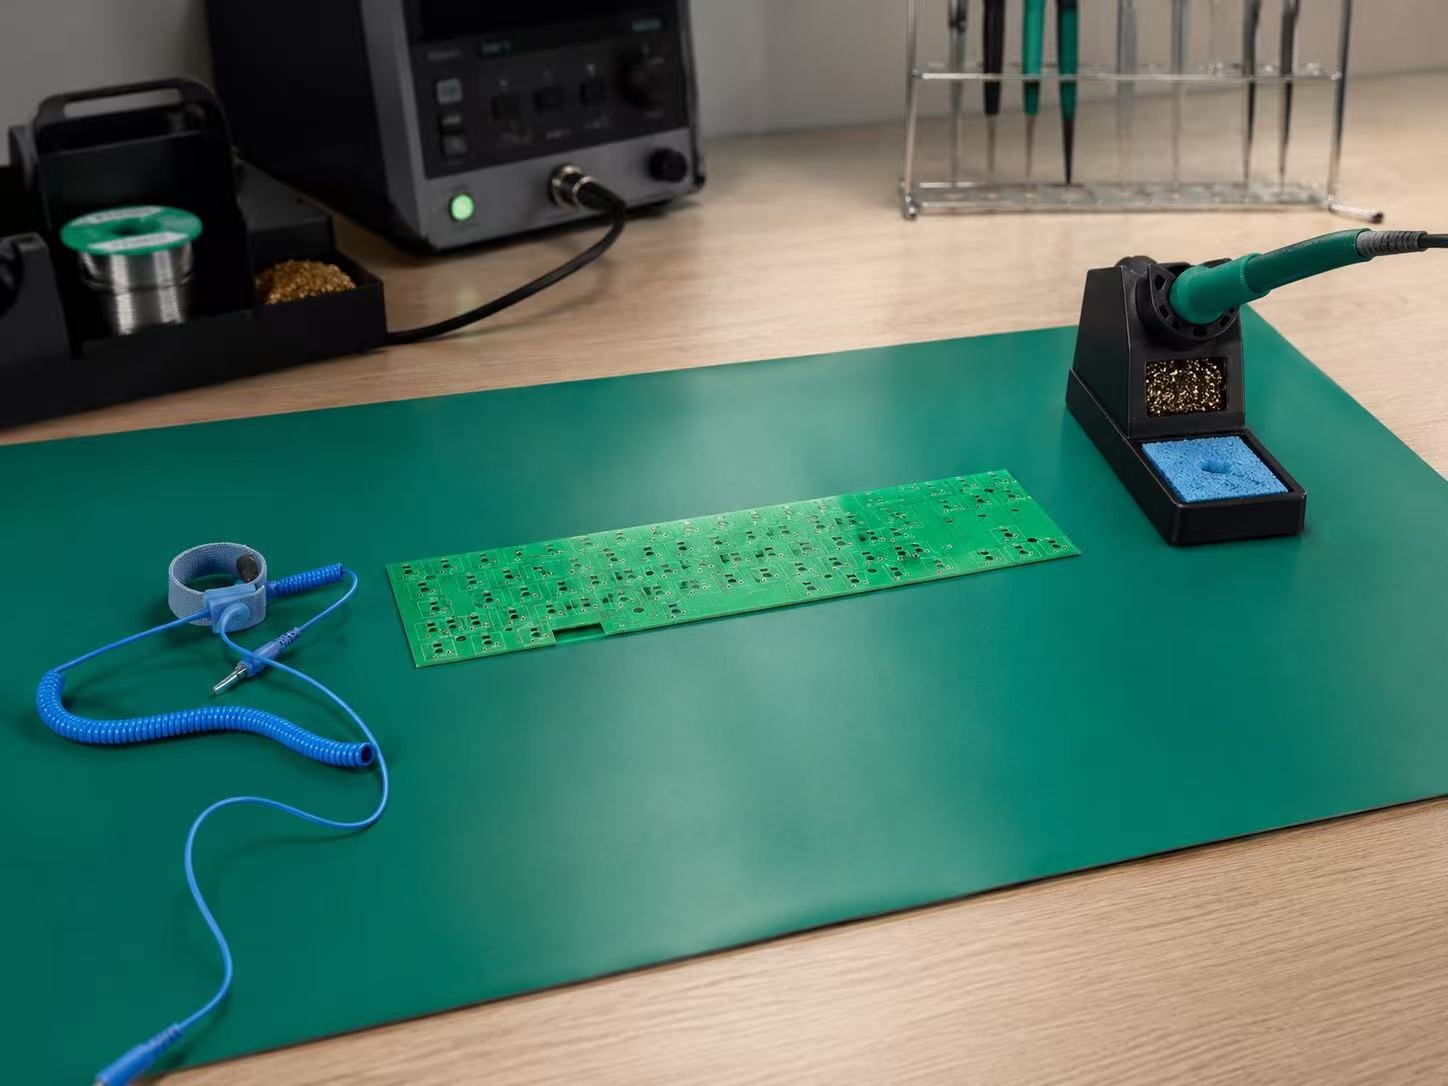
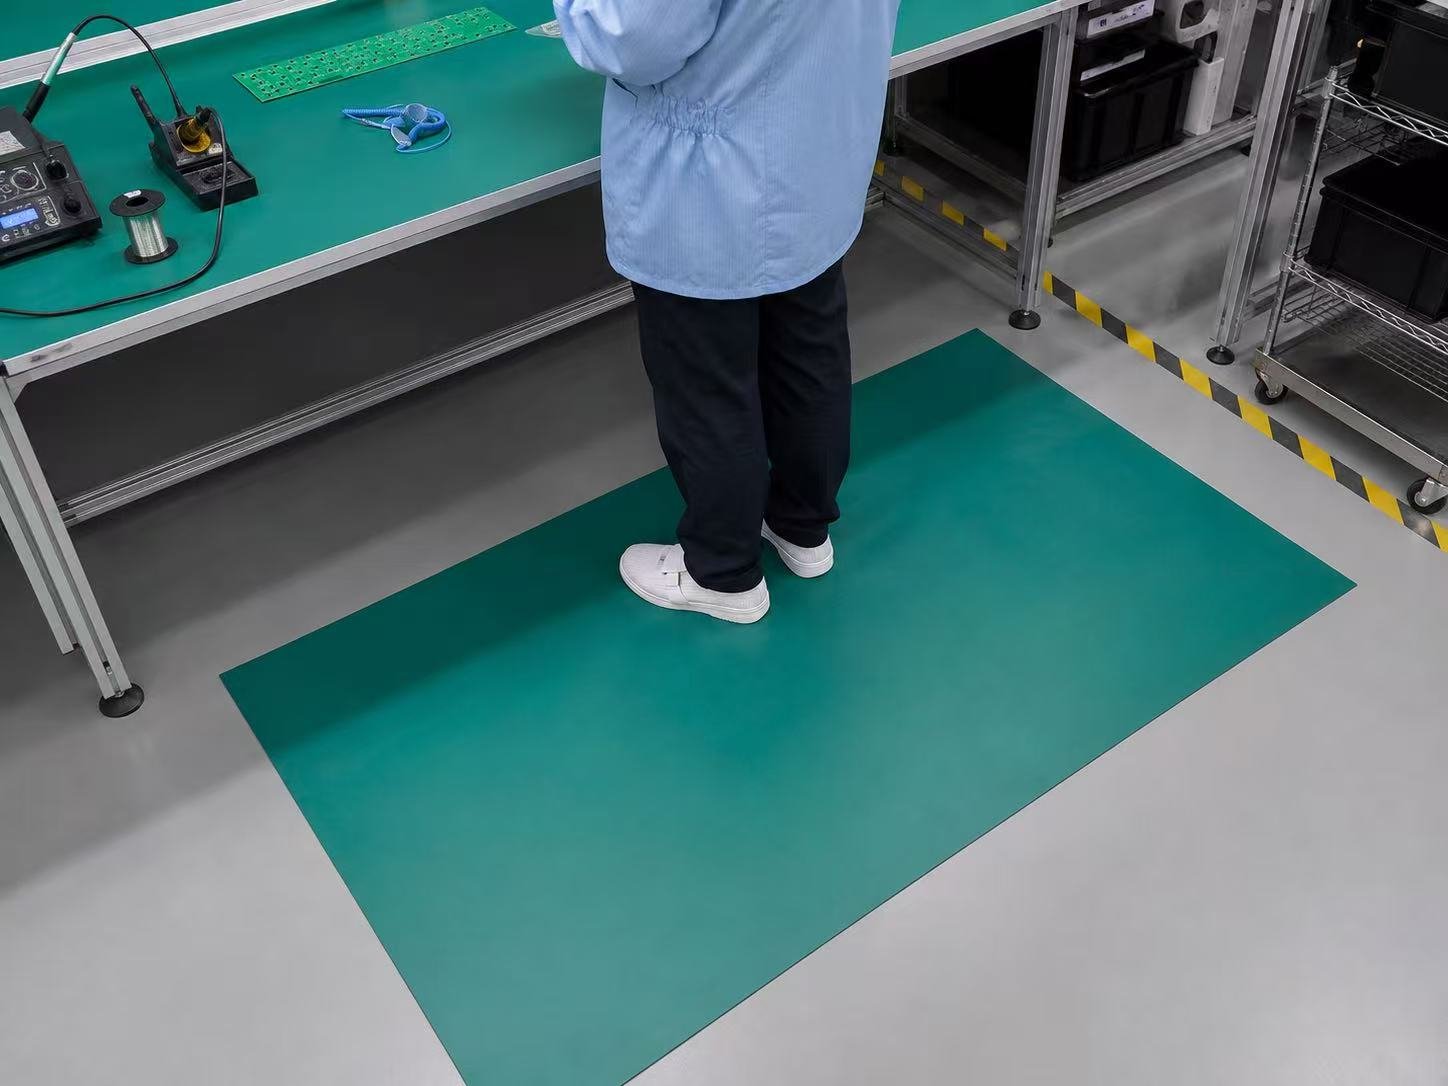
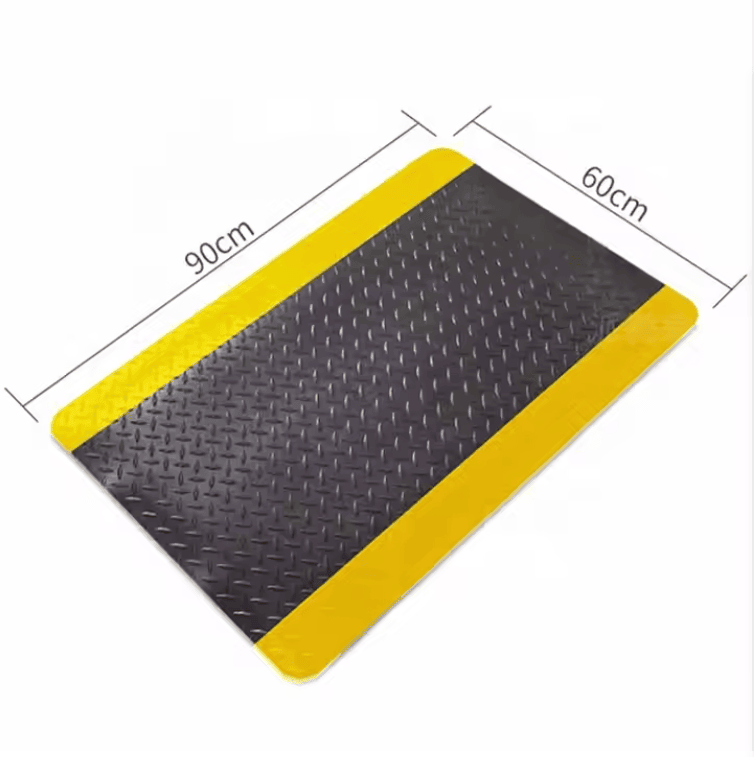
Static dissipative mat installed on an electronics assembly workbench
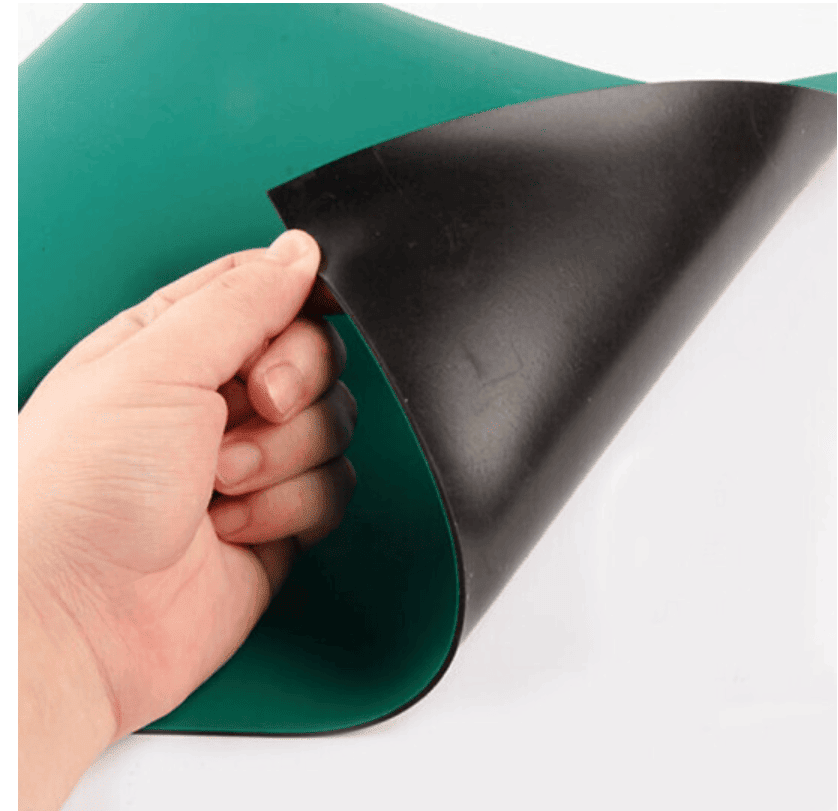
Two-layer rubber anti static mat with dissipative top and conductive bottom layer
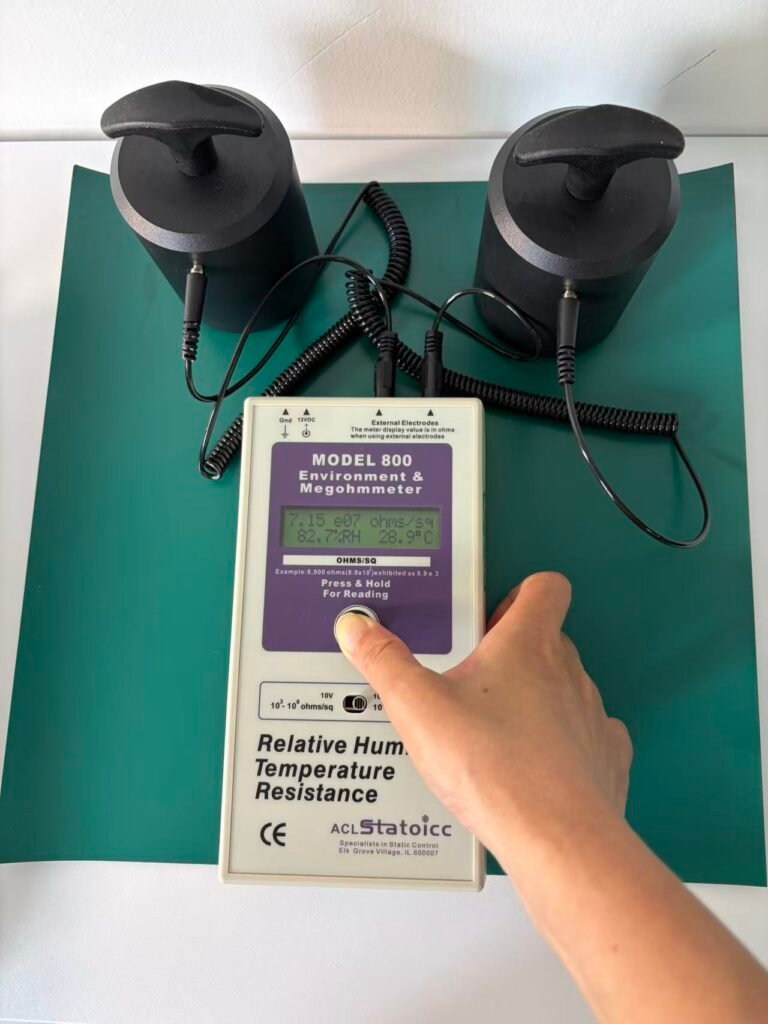
ACL 800 resistance meter testing a rubber anti static mat
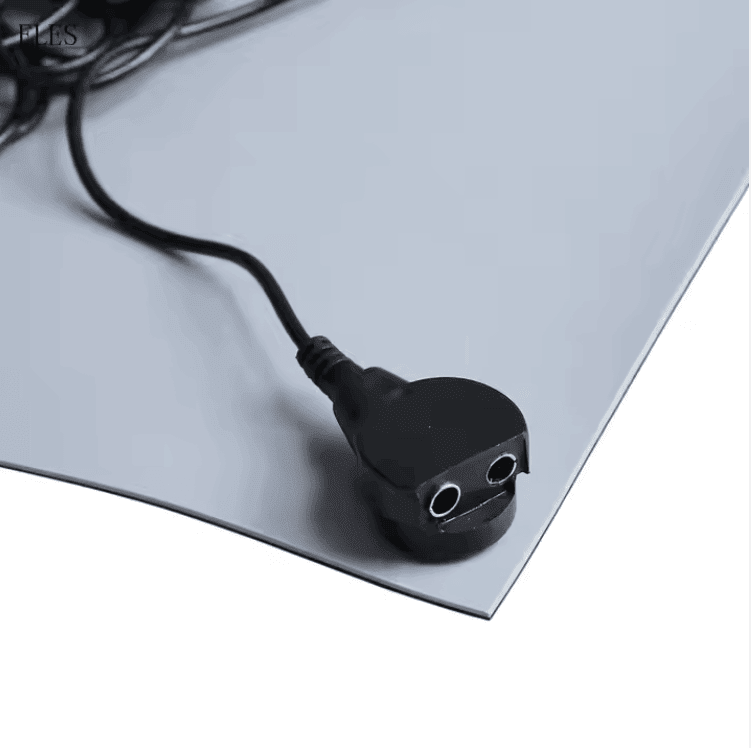
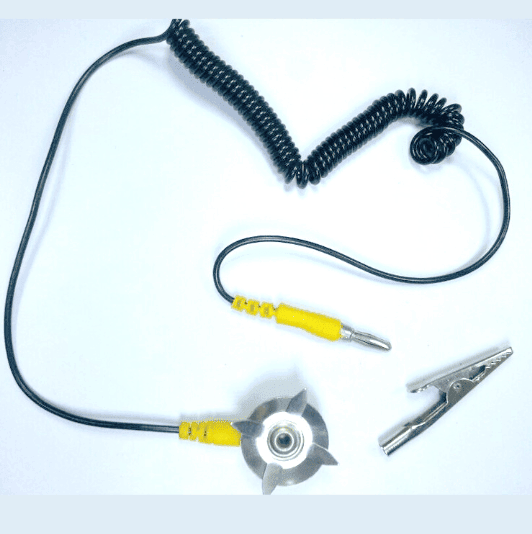
Grounding an ESD floor mat using a grounding cord connected to a common point ground and earth ground.
Conductive mat versus static dissipative mat resistance comparison
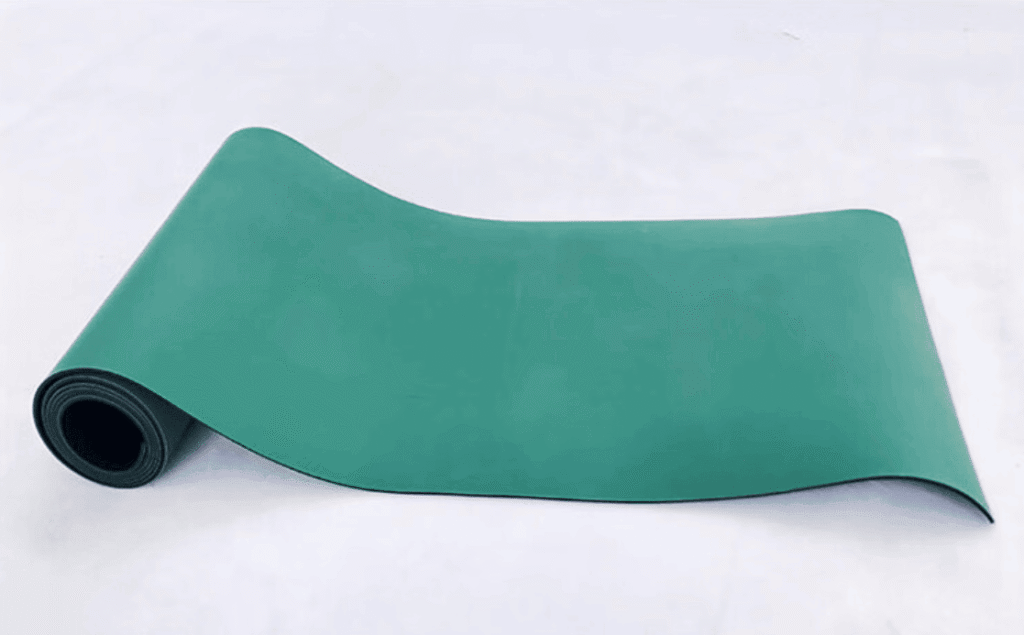
Static dissipative rubber mat rolls in ESDBEST manufacturing facility

A static dissipative mat provides a controlled path for electrostatic charge to move away from personnel, tools, components and work surfaces without creating an uncontrolled rapid discharge.

In electronics manufacturing, PCB assembly, semiconductor handling, laboratory testing, repair operations and electrostatic protected areas, this controlled dissipation helps reduce the risk of electrostatic discharge reaching sensitive electronic components.

Unlike an ordinary rubber sheet or an insulating desktop covering, a properly selected static dissipative mat is designed with measurable electrical resistance. When the mat is correctly connected to an approved grounding system, accumulated charge can flow toward ground at a controlled rate.

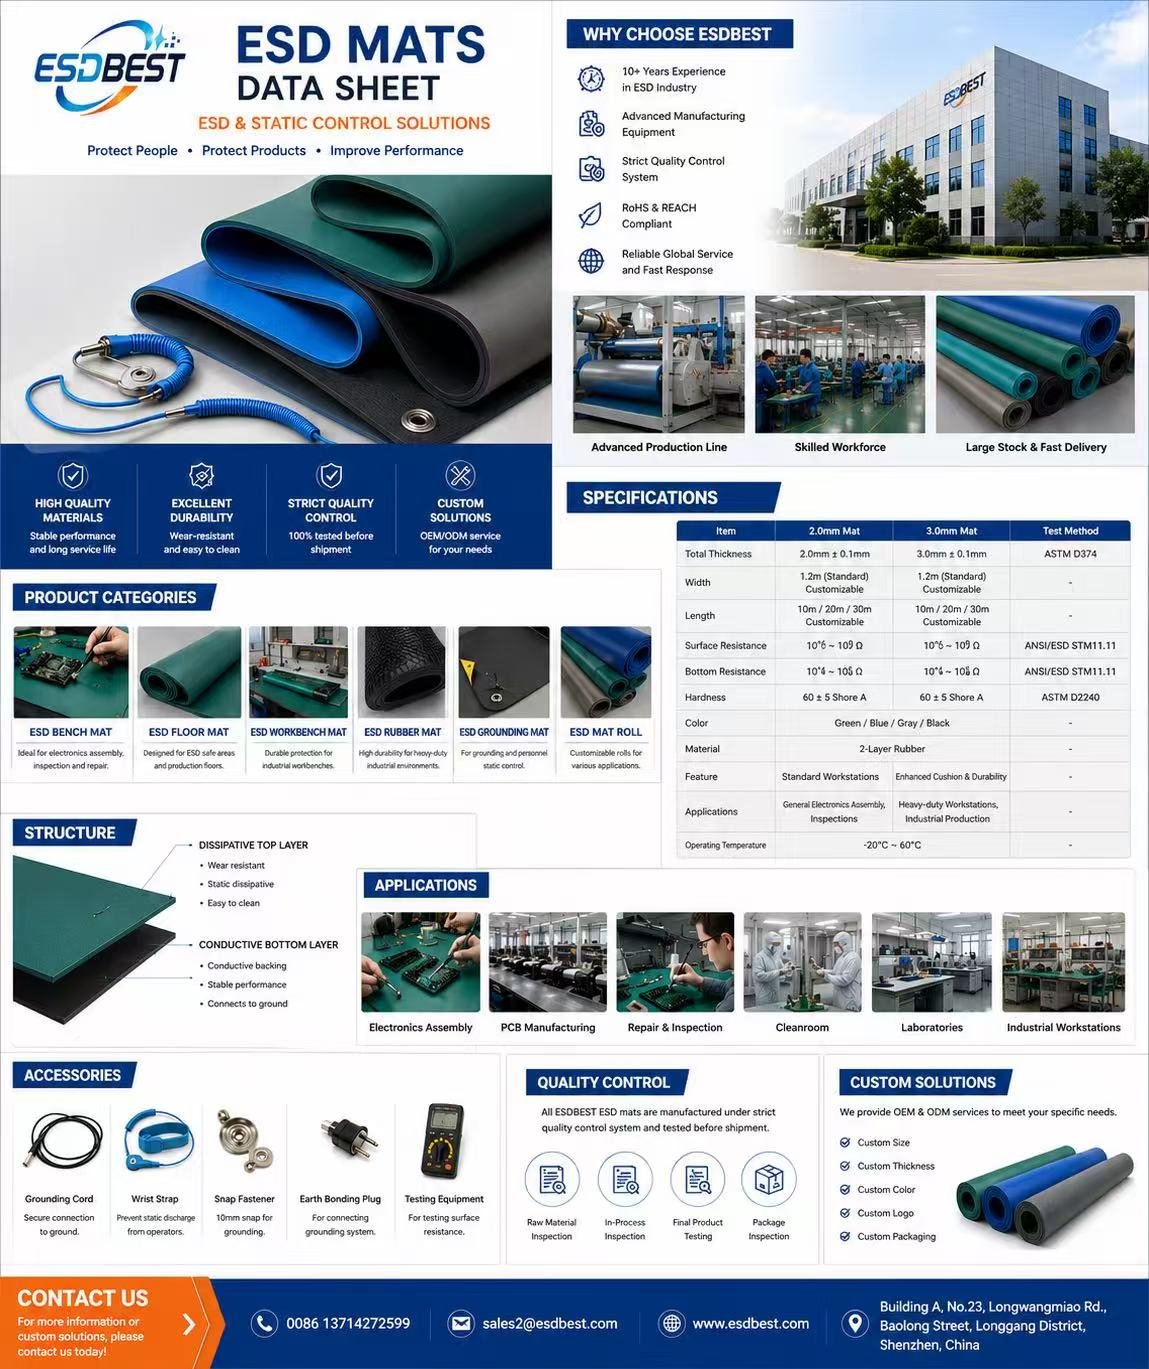
ESDBEST manufactures two-layer rubber ESD mats for electronics workbenches, assembly lines, inspection stations, laboratories and other static-sensitive environments. Standard sizes, rolls, cut sheets, custom dimensions, colors, logos and grounding accessories are available for OEM and industrial procurement projects.

Get a Bulk Quote

Email: sales2@esdbest.com

Phone / WhatsApp: +86 137 1427 2599

Need help selecting an ESD mat?

[Request an ESD Mat Sample]

[Get a Bulk Price Quote]

[Download the ESD Mat Technical Datasheet]


Quick Navigation

  • What Is a Static Dissipative Mat?
  • How Does a Dissipative Mat Work?
  • Static Dissipative Mat Resistance
  • Conductive vs Dissipative Mats
  • Static Dissipative vs Anti-Static Mats
  • Two-Layer Rubber Mat Construction
  • Main Applications
  • Grounding Requirements
  • How to Test the Mat
  • How to Choose the Correct Mat
  • Installation and Maintenance
  • Frequently Asked Questions
  • Request a Quote

What Is a Static Dissipative Mat?

A static dissipative mat is a static-control surface designed to reduce accumulated electrostatic charge through controlled electrical resistance.

The mat is normally installed on an electronics workbench, assembly table, inspection station, repair bench, laboratory surface or floor area where electrostatic-sensitive devices are handled.

A dissipative surface is neither a highly conductive metal surface nor a fully insulating material. Its electrical properties are positioned between those two extremes.

This distinction matters because an insulating surface can retain charge for an extended period, while a very low-resistance conductive surface may allow charge to move more rapidly than desired. A dissipative mat is designed to provide a more controlled path.

The EOS/ESD Association describes dissipative materials generally as materials with surface or volume resistance from 1 × 10⁴ ohms to less than 1 × 10¹¹ ohms. However, the acceptable resistance for an installed work surface, floor or complete grounding system depends on the applicable ESD control standard, the test method and the intended application. tronics work surfaces, buyers commonly specify resistance-to-ground performance below 1 × 10⁹ ohms. The final acceptance limit should be defined by the facility’s ESD control plan rather than by a product name alone.

Simple definition

A static dissipative mat is:

A resistance-controlled work surface that allows electrostatic charge to move toward ground gradually when the mat is installed and grounded correctly.

The mat does not eliminate every possible source of static electricity. Instead, it becomes one component in a complete ESD control system that may also include:

  • Personnel grounding
  • ESD wrist straps
  • ESD footwear
  • Grounding cords
  • Common-point grounds
  • Ionizers
  • Conductive storage systems
  • ESD-safe tools
  • Humidity control
  • Compliance verification testing

Learn more in our complete ESD Mat Guide.


Why Static Electricity Is Dangerous in Electronics Manufacturing

Static electricity can be generated whenever two materials contact and separate, rub against each other or move relative to one another.

Common charge-generating activities include:

  • Walking across a floor
  • Removing plastic packaging
  • Sliding trays across a workstation
  • Handling foam, tape or plastic films
  • Moving PCB assemblies
  • Adjusting clothing
  • Sitting down or standing up
  • Peeling protective liners
  • Using ordinary plastic containers
  • Moving tools across an insulating surface

An electrostatic discharge may occur when a charged person or object approaches a conductor or an electronic component at a different electrical potential.

Not every ESD event produces a visible spark or a sensation that an operator can feel. Sensitive electronic devices may be affected by voltage levels substantially below the level normally perceptible to a person.

Possible consequences include:

  • Immediate component failure
  • Latent damage
  • Reduced product reliability
  • Intermittent faults
  • Increased repair costs
  • Failed final inspection
  • Customer returns
  • Production downtime
  • Difficult-to-diagnose field failures

For this reason, ESD control should not rely only on whether operators can see or feel a discharge.

A properly grounded dissipative mat helps keep conductive and dissipative items at a common electrical potential through equipotential bonding and grounding. This is one of the fundamental principles of ESD control described by the EOS/ESD Association. oes a Static Dissipative Mat Work?

A static dissipative mat works by combining three elements:

  1. A resistance-controlled surface
  2. A conductive or lower-resistance path within the mat
  3. A verified connection to an approved grounding point

When a charged conductive object contacts the mat, charge can move through or across the mat toward the connected ground.

The electrical resistance limits the rate of current flow. This is what differentiates a static-control mat from an ordinary conductive metal surface and from an insulating tabletop.

Typical charge path

A simplified charge path may look like this:

Charged object → dissipative top layer → conductive bottom layer → grounding snap → ground cord → common-point ground → equipment ground

The mat must be part of a complete and continuous path. A product described as “dissipative” will not provide reliable grounding performance if:

  • It is not connected to ground
  • The grounding snap is loose
  • The cord is damaged
  • The ground point is incorrect
  • The mat is installed over an unsuitable surface
  • Contamination changes the surface resistance
  • The mat has aged or cracked
  • The operator or component does not contact the controlled surface

For installation details, read How to Ground an ESD Mat.


Static Dissipative Mat Resistance Explained

Resistance is one of the most important specifications when selecting an ESD mat, but it is also one of the most frequently misunderstood.

Buyers may encounter several different terms:

  • Surface resistance
  • Surface resistivity
  • Resistance to ground
  • Point-to-point resistance
  • Volume resistance
  • System resistance

These terms are related, but they are not interchangeable.

1. Surface resistance

Surface resistance measures the resistance between two electrodes placed on the surface of a material.

The result can depend on:

  • Electrode design
  • Electrode spacing
  • Applied test voltage
  • Test duration
  • Temperature
  • Relative humidity
  • Surface cleanliness
  • Material conditioning
  • Test standard

The EOS/ESD Association notes that resistance results are influenced by the electrode arrangement and measurement method. Therefore, resistance values should always be compared using an appropriate and consistent test method. ance to ground

Resistance to ground measures the electrical path from a location on the mat to the connected grounding point.

This is especially important after installation because it evaluates more than the mat material alone. It may also reveal problems with:

  • Ground cords
  • Grounding snaps
  • Connectors
  • Common-point grounds
  • Surface contamination
  • Installation quality

3. Point-to-point resistance

Point-to-point resistance measures the path between two locations on the mat surface.

This test helps evaluate whether electrical performance is reasonably consistent across the working area.

4. Volume resistance

Volume resistance measures current flow through the thickness of the material rather than across the surface.

This test can be relevant when evaluating material construction or when required by a specific product standard.

5. System resistance

System resistance evaluates multiple connected components as a complete path.

For example:

Person → footwear → floor → ground

or:

Tool or component → work surface → grounding cord → ground

System testing is important because individually compliant products do not automatically guarantee that the complete installation performs as intended.


Material Classification vs Installed Product Requirements

A common SEO and technical mistake is to publish one resistance range and claim that it applies to every dissipative product.

It does not.

The general material classification, the work-surface requirement and the flooring-system requirement may use different limits.

General dissipative material range

The EOS/ESD Association’s general definition identifies dissipative materials within a broad resistance range of:

1 × 10⁴ ohms to less than 1 × 10¹¹ ohms

This is a material classification, not a universal pass/fail requirement for every installed ESD mat. ace applications

For many electronics work surfaces, resistance to ground is commonly specified below:

1 × 10⁹ ohms

The exact acceptable range should be stated in the facility’s ESD control plan and verified with the specified test method.

Dissipative flooring applications

The EOS/ESD Association describes dissipative flooring as having resistance to ground greater than 1 × 10⁶ ohms and less than 1 × 10⁹ ohms in the flooring classification discussed in its technical guidance. provides test methods for evaluating resistance to ground, point-to-point resistance and vertical resistance for floor coverings and installed floors. ed buyer approach

Do not approve a mat based only on a catalog statement such as:

  • “Anti-static”
  • “10⁶–10⁹”
  • “ESD-safe”
  • “Conductive”
  • “Dissipative”

Instead, request:

  • Test method
  • Test voltage
  • Test equipment
  • Electrode type
  • Test environment
  • Test report
  • Lot information
  • Resistance-to-ground result
  • Point-to-point result
  • Product construction
  • Grounding instructions

Read our detailed ESD Mat Resistance Guide.

Get a Bulk Quote

Email: sales2@esdbest.com

Phone / WhatsApp: +86 137 1427 2599

Static Dissipative Mat vs Conductive Mat

Static dissipative and conductive mats are both used for electrostatic control, but their electrical behavior is not identical.

Feature Static Dissipative Mat Conductive Mat
Electrical behavior Controls charge movement Provides a lower-resistance path
Discharge rate More gradual Generally faster
Typical use Electronics workbenches and controlled handling Grounding layers, floors or specific ESD systems
Operator contact Often preferred as the working surface Depends on system design
Grounding required Yes Yes
Selection basis Product and system requirements Product and system requirements
Testing Resistance to ground and point-to-point Resistance to ground and point-to-point

A conductive material should not automatically be considered “better” simply because its resistance is lower.

The correct selection depends on:

  • Device sensitivity
  • Workstation design
  • Grounding system
  • Required discharge rate
  • Personnel safety considerations
  • Applicable ESD standard
  • Facility ESD control plan

Many two-layer ESD rubber mats use:

  • A static dissipative upper working layer
  • A conductive lower grounding layer

This construction combines a controlled contact surface with an effective path toward the grounding connection.

For a complete comparison, visit Conductive vs Dissipative ESD Mats.


Static Dissipative Mat vs Anti-Static Mat

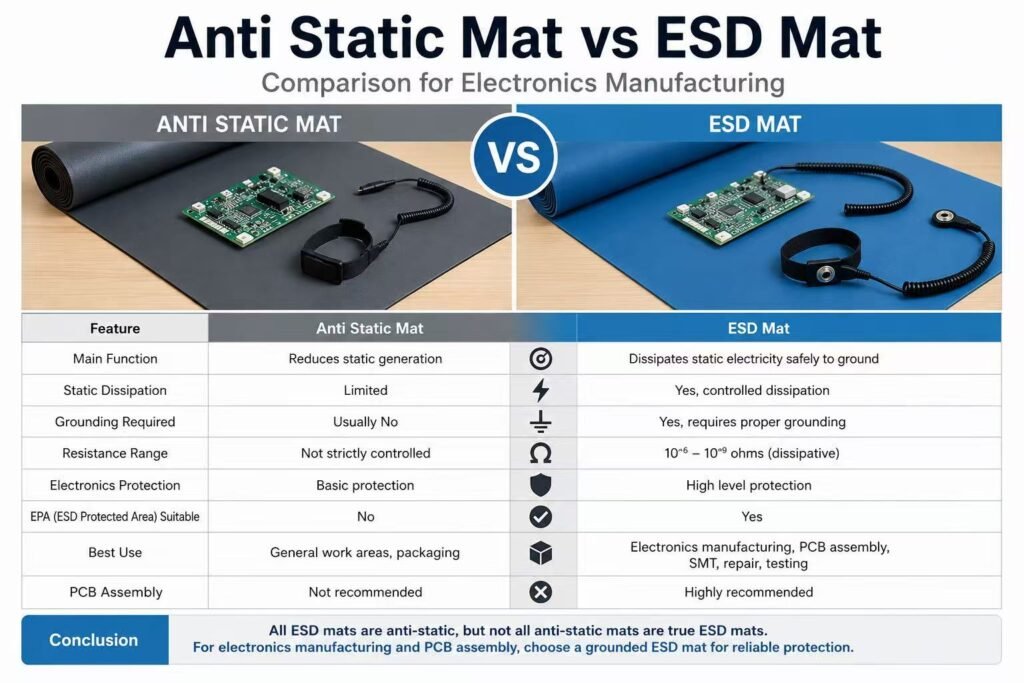
The terms “static dissipative” and “anti-static” are often used as though they mean the same thing.

They do not necessarily describe the same electrical performance.

Anti-static

“Anti-static” generally describes a material or product intended to reduce static generation or accumulation.

However, the term may not tell the buyer:

  • The actual resistance
  • The test method
  • The discharge rate
  • Whether the product can be grounded
  • Whether performance is permanent
  • Whether the product is suitable for an EPA

Some anti-static treatments depend on topical additives, humidity or temporary surface chemistry. Performance may change after cleaning, wear or environmental exposure.

Static dissipative

“Static dissipative” refers more specifically to resistance-controlled charge movement.

A reliable dissipative mat should be supported by measurable electrical data rather than by the product label alone.

Practical procurement rule

When purchasing a mat for PCB assembly or electronic component handling, ask for resistance test data rather than accepting “anti-static” as the only specification.

Read Anti-Static Mat vs ESD Mat for a more detailed comparison.


Two-Layer Rubber Static Dissipative Mat Construction

ESDBEST supplies two-layer rubber ESD mats designed for professional electronics workstations.

A typical construction includes:

Top layer: static dissipative working surface

The upper layer is the primary work surface.

It is designed to:

  • Provide controlled charge dissipation
  • Support electronics assembly operations
  • Resist normal abrasion
  • Provide a smooth working area
  • Allow routine cleaning
  • Reduce glare compared with highly reflective surfaces
  • Support custom color and size requirements

Bottom layer: conductive grounding layer

The lower layer provides a lower-resistance path toward the grounding connection.

It helps:

  • Improve grounding continuity
  • Distribute charge across the mat
  • Connect the work surface to the grounding snap
  • Support consistent resistance-to-ground performance

Why two-layer construction matters

A mat made from one uniform material may not provide the same balance between surface behavior, durability and grounding performance.

A two-layer design allows the manufacturer to engineer the top and bottom layers for different functions.

Typical product options may include:

  • 2 mm thickness
  • 3 mm thickness
  • Standard rolls
  • Pre-cut workbench sizes
  • Green, blue, gray or custom colors
  • Smooth or textured finishes
  • Custom printed logos
  • Installed grounding snaps
  • Complete grounding kits

Final specifications should be confirmed against the ESDBEST quotation, technical datasheet and production sample.

Static Dissipative Mat Applications

1. PCB assembly workstations

PCB assembly areas contain components that may be vulnerable to electrostatic discharge.

A dissipative workbench mat can be used during:

  • Manual component insertion
  • PCB inspection
  • Soldering
  • Rework
  • Testing
  • Programming
  • Cleaning
  • Quality control

The mat should be used together with appropriate personnel grounding, tools and storage controls.

Learn more in ESD Mats for PCB Assembly.

2. SMT production lines

Static-control mats may be installed at manual stations located before, within or after the SMT production process.

Possible locations include:

  • Material preparation
  • Feeder setup
  • First-article inspection
  • AOI review
  • Rework stations
  • Functional testing
  • Final inspection
  • Packing areas

3. Electronics repair benches

Repair technicians frequently handle exposed circuit boards, connectors, ICs and other sensitive devices.

A complete repair workstation may include:

  • Dissipative bench mat
  • Ground cord
  • Common-point ground
  • Wrist strap
  • Wrist-strap monitor
  • ESD-safe soldering iron
  • ESD-safe tools
  • Ionizer
  • ESD storage containers

4. Semiconductor handling

Semiconductor operations may require strict control of personnel, tools, work surfaces, packaging and environmental conditions.

The selected mat must match the site’s approved ESD control plan and verification requirements.

5. Laboratories

Dissipative mats may be used in:

  • Electronics research laboratories
  • Product development facilities
  • Testing laboratories
  • Failure-analysis areas
  • Calibration stations
  • Educational electronics laboratories

6. Medical electronics assembly

Manufacturers of medical electronic products may use ESD-controlled workstations when assembling or inspecting electronic modules and circuit boards.

7. Aerospace and automotive electronics

Static-sensitive electronic assemblies are also used in:

  • Vehicle control systems
  • Sensor modules
  • Navigation equipment
  • Aerospace electronics
  • Communication systems
  • Power-control assemblies

8. Cleanroom workstations

A mat intended for cleanroom use should be evaluated not only for electrical resistance but also for:

  • Particle generation
  • Chemical compatibility
  • Cleanability
  • Outgassing requirements
  • Surface finish
  • Facility cleaning procedures

“ESD-safe” does not automatically mean “cleanroom compatible.”


Does a Static Dissipative Mat Need to Be Grounded?

Yes. A static dissipative mat normally requires a verified connection to an approved ground in order to provide a continuous path for charge removal.

Without grounding, the mat may:

  • Receive charge from a person or object
  • Spread charge across part of its surface
  • Retain charge
  • Float at an uncontrolled electrical potential
  • Fail to protect the workstation as intended

Typical grounding components

A standard installation may use:

  • Grounding snap
  • Ground cord
  • Built-in current-limiting resistor where required
  • Common-point ground
  • Verified equipment ground
  • Grounding terminal
  • Workstation monitor

The mat ground and wrist-strap connection may terminate at a common-point ground designed for the workstation.

Important safety note

Do not connect an ESD mat to:

  • An unknown wire
  • A painted metal structure
  • A water pipe without approval
  • A random screw
  • An unverified outlet connection
  • Neutral instead of protective earth
  • Machinery without confirming the grounding design

Grounding work should follow the facility’s electrical and ESD safety procedures.

Read the complete ESD Mat Grounding Guide.

How to Install a Static Dissipative Mat

Step 1: Inspect the workbench

Remove:

  • Dust
  • Oil
  • Metal chips
  • Adhesive residue
  • Sharp objects
  • Moisture
  • Damaged coverings

The supporting surface should be flat, stable and suitable for the mat.

Step 2: Position the mat

Place the dissipative top surface upward and the conductive grounding layer downward.

Confirm that:

  • The mat covers the intended work area
  • The edges do not create a trip or snag hazard
  • The ground connection remains accessible
  • Heat sources will not damage the mat
  • Sharp tools will not repeatedly cut the surface

Step 3: Install the grounding snap

Use a compatible snap and installation tool.

The snap should make reliable electrical contact with the mat construction and should not rotate or loosen during normal use.

Step 4: Attach the ground cord

Connect the cord securely to:

  • The mat snap
  • The approved common-point ground or grounding terminal

Step 5: Verify the ground point

Do not assume that a grounding point is functional because it is labeled.

Confirm it according to the site’s electrical safety and ESD verification procedure.

Step 6: Test the installed mat

Measure:

  • Resistance to ground
  • Point-to-point resistance
  • Ground-cord continuity
  • Grounding snap connection

Document the results before releasing the workstation for production.

Step 7: Add personnel grounding

A mat alone does not ground an operator.

Depending on the workstation design, personnel grounding may include:

  • Wrist strap
  • Continuous monitor
  • ESD footwear
  • Heel grounders
  • ESD floor system

How to Test a Static Dissipative Mat

Testing should be performed:

  • At installation
  • After repair
  • After moving the workstation
  • At a defined periodic interval
  • After changing cleaning chemicals
  • When visible damage appears
  • When ESD performance is questioned

Recommended test equipment

Depending on the required procedure, testing may use:

  • Surface resistance meter
  • Resistance-to-ground meter
  • Approved electrodes
  • Test leads
  • Ground verification device
  • Temperature and humidity meter
  • Calibration documentation

Resistance-to-ground test

  1. Confirm that the test equipment is within calibration.
  2. Clean and condition the mat according to the procedure.
  3. Record temperature and relative humidity.
  4. Connect one lead to the approved grounding point.
  5. Place the electrode on the mat.
  6. Apply the specified test voltage.
  7. Wait for the required measurement time.
  8. Record the result.
  9. Repeat at representative locations.
  10. Compare the results with the facility’s acceptance limits.

Point-to-point test

  1. Disconnect or configure the mat as required by the selected method.
  2. Position two electrodes at the specified distance.
  3. Apply the correct test voltage.
  4. Record the stabilized reading.
  5. Repeat in multiple directions and locations.
  6. Document any abnormal variation.

Why humidity matters

Electrical resistance can change with environmental conditions.

Some materials become more conductive at higher humidity and more resistive at lower humidity.

For meaningful comparison, record:

  • Temperature
  • Relative humidity
  • Conditioning time
  • Cleaning condition
  • Test voltage
  • Electrode arrangement
  • Measurement duration

Do not rely only on a handheld indicator

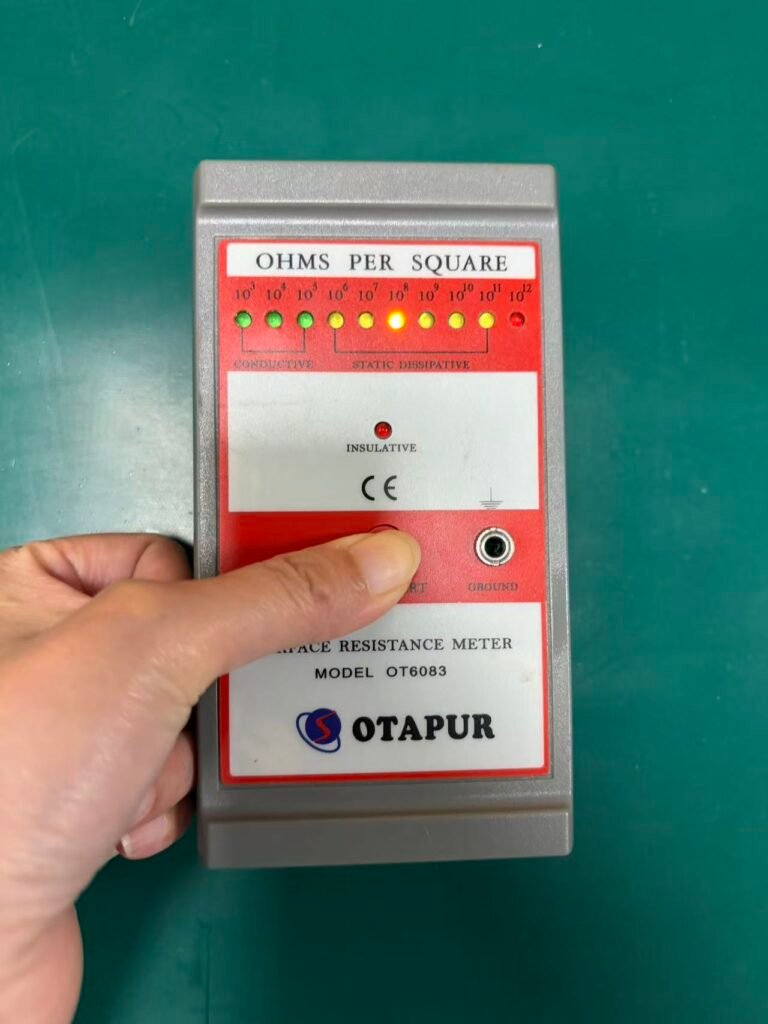
A simple LED tester may provide a quick screening result, but it may not replace a calibrated resistance meter and the required test method.

Read How to Test an ESD Mat for the complete ACL800 testing procedure.


Common Static Dissipative Mat Testing Mistakes

Mistake 1: Testing only one location

Damage and contamination may be localized.

Test representative positions, including:

  • Center
  • Corners
  • Near the ground connection
  • High-use areas
  • Areas exposed to soldering or chemicals

Mistake 2: Ignoring humidity

Resistance results obtained under very different environmental conditions may not be directly comparable.

Mistake 3: Using the wrong test voltage

The measurement procedure may require a particular voltage based on the resistance range and applicable method.

Mistake 4: Mixing resistance and resistivity

Surface resistance and surface resistivity are different quantities and may involve different units and electrode arrangements.

Mistake 5: Testing a dirty mat

Flux, oils, dust, adhesive and cleaning residues can change the result.

Mistake 6: Testing the mat but not the ground cord

The mat may pass while the installed grounding path fails.

Mistake 7: Accepting the product label as proof

“ESD,” “anti-static” or “dissipative” printed on the product is not a substitute for test data.


Static Dissipative Mat Standards and Test References

Depending on the application and customer requirements, relevant references may include:

ANSI/ESD S20.20

ANSI/ESD S20.20 provides a framework for establishing an ESD control program for protecting electrical and electronic parts, assemblies and equipment.

The facility should define:

  • Technical requirements
  • Grounding methods
  • Product qualification
  • Compliance verification
  • Training
  • Records
  • Corrective actions

ANSI/ESD STM4.1

This test method is commonly associated with resistance measurements for work surfaces and resistance-to-ground performance.

Confirm the current revision and required procedure before testing.

ANSI/ESD STM11 series

The STM11 series includes methods for evaluating electrical resistance properties of planar materials, including surface resistance, volume resistance and two-point resistance. -5-1

IEC 61340-5-1 is widely used for electrostatic control programs in electronics manufacturing.

IEC 61340-4-1

IEC 61340-4-1 specifies methods for measuring electrical resistance of floor coverings and installed floors. -4-5

IEC 61340-4-5 evaluates electrostatic protection provided by a footwear-flooring-person system. Results apply to the specific footwear and flooring combination tested. 340-5-4

IEC TS 61340-5-4 describes compliance verification testing for technical items used within an ESD control program. standards note

A product should not be described as “certified to every ESD standard” unless the claim is supported by appropriate certification, testing and scope.

A test report should identify:

  • Product tested
  • Sample condition
  • Test method
  • Test equipment
  • Calibration status
  • Test environment
  • Electrode arrangement
  • Applied voltage
  • Results
  • Test date
  • Laboratory or responsible personnel

How to Choose a Static Dissipative Mat

1. Define the application

Determine whether the mat will be used for:

  • PCB assembly
  • Soldering
  • Inspection
  • Repair
  • Laboratory testing
  • Packaging
  • Cleanroom work
  • Floor protection
  • General electronics work

2. Confirm the required resistance

Do not start with a generic product range.

Start with:

  • Customer specification
  • ESD control plan
  • Applicable standard
  • Product qualification requirement
  • Compliance verification limit

3. Choose bench mat or floor mat

A bench mat and a floor mat serve different purposes.

A bench mat controls the working surface where components are handled.

A floor mat is generally part of a personnel-grounding or floor-control system.

Compare them in ESD Floor Mat vs Bench Mat.

4. Select the material

Common ESD mat materials include:

  • Rubber
  • PVC
  • Vinyl
  • Foam
  • Laminates
  • Specialized polymer compounds

For professional electronics workbenches, two-layer rubber mats are widely selected because they can provide:

  • Durable construction
  • Resistance-controlled surface performance
  • Heat resistance appropriate to normal workstation use
  • Good dimensional stability
  • A conductive backing layer
  • Long service life when maintained correctly

5. Select the thickness

Typical thickness options include 2 mm and 3 mm.

2 mm mat

Suitable for:

  • Standard electronics assembly
  • Inspection tables
  • General PCB work
  • Large roll installations
  • Applications where lower weight is preferred

3 mm mat

Suitable for:

  • Heavier workstation use
  • Areas where additional cushioning is desired
  • Workbenches exposed to frequent tool handling
  • Buyers who prefer a thicker material

Thickness alone does not determine electrical performance.

6. Select the size

Measure:

  • Bench width
  • Bench depth
  • Grounding-point location
  • Equipment footprint
  • Operator working area
  • Clearance around machines
  • Required edge allowance

Custom cutting can reduce seams and improve workstation coverage.

7. Check chemical and heat exposure

Identify whether the mat may contact:

  • Flux
  • Isopropyl alcohol
  • Cleaning agents
  • Adhesives
  • Oils
  • Solder
  • Heat tools
  • UV light
  • Process chemicals

Request compatibility information before approval.

8. Review fire and safety requirements

Some facilities require specific:

  • Flammability performance
  • Chemical restrictions
  • RoHS documentation
  • REACH documentation
  • Material declarations
  • Safety data
  • Packaging requirements

9. Request a sample

A production sample allows the buyer to verify:

  • Color
  • Surface finish
  • Odor
  • Thickness
  • Flatness
  • Resistance
  • Grounding compatibility
  • Cleaning performance
  • Logo quality

10. Evaluate the supplier

Ask whether the supplier can provide:

  • Technical datasheet
  • Test report
  • Production-lot traceability
  • Custom sizes
  • Grounding kits
  • Packaging options
  • Logo printing
  • OEM support
  • Stable repeat production
  • Pre-shipment inspection

Static Dissipative Mat Cleaning and Maintenance

A dirty ESD mat may no longer perform as expected.

Recommended cleaning procedure

  1. Remove electronic components and equipment.
  2. Disconnect power and grounding accessories as required.
  3. Remove loose dust with an ESD-safe method.
  4. Apply an approved ESD mat cleaner.
  5. Wipe with a clean, low-lint cloth.
  6. Remove cleaner residue.
  7. Allow the surface to dry completely.
  8. Reconnect the grounding system.
  9. Verify resistance when required.

Avoid unapproved products

Do not use ordinary products without evaluating their effect on the mat.

Potentially problematic products include:

  • Wax
  • Silicone polish
  • Oil-based cleaner
  • Abrasive powder
  • Strong solvent
  • Household furniture polish
  • Products that leave an insulating film

Inspection checklist

Inspect the mat for:

  • Cuts
  • Cracks
  • Burns
  • Delamination
  • Curling edges
  • Permanent deformation
  • Loose snaps
  • Damaged cords
  • Chemical staining
  • Adhesive residue
  • Excessive wear

When should a mat be replaced?

Replace or investigate the mat when:

  • Resistance falls outside the approved limit
  • The grounding snap cannot be repaired
  • The conductive layer is exposed inappropriately
  • The mat is severely cracked
  • The surface is contaminated beyond recovery
  • Delamination affects performance
  • The mat no longer lies flat
  • Physical damage creates a safety risk

Read How Long Do ESD Mats Last? for additional maintenance guidance.

Common Buying Mistakes

Choosing by color

Green, blue or gray does not prove that a mat is dissipative.

Color is primarily a visual and product-design choice.

Choosing by the lowest price

A low-cost mat may lack:

  • Stable resistance
  • Consistent thickness
  • Durable construction
  • Proper grounding accessories
  • Reliable test reports
  • Lot consistency

Buying without a test method

A resistance value without a test method is incomplete.

Ignoring the grounding system

The mat, cord, snap and ground point must work together.

Treating every “anti-static” mat as EPA compliant

Anti-static marketing language does not automatically establish suitability for an electrostatic protected area.

Using a floor mat on a workbench without evaluation

Floor and bench products may have different:

  • Surface textures
  • Construction
  • Resistance targets
  • Cleaning requirements
  • Mechanical properties

Installing once and never retesting

ESD control is an ongoing verification process, not a one-time purchase.


Why Choose ESDBEST Static Dissipative Mats?

Two-layer rubber construction

Our ESD mats combine a dissipative upper working layer with a conductive lower layer designed to support a controlled grounding path.

Industrial manufacturing experience

ESDBEST supplies static-control products for electronics manufacturing, PCB assembly, laboratories, production lines and industrial ESD projects.

Custom sizes and rolls

Available options may include:

  • Full rolls
  • Cut sheets
  • Workbench dimensions
  • Custom widths
  • Custom lengths
  • 2 mm and 3 mm thicknesses
  • Custom packaging

OEM customization

OEM services may include:

  • Custom color
  • Printed logo
  • Private label
  • Grounding snaps
  • Grounding cords
  • Branded cartons
  • Product labels
  • Technical document support

Test documentation

Product-specific electrical data and test documentation can be supplied according to the confirmed order and test requirements.

Complete ESD workstation supply

ESDBEST can also supply:

  • ESD wrist straps
  • Grounding cords
  • Common-point grounds
  • ESD gloves
  • ESD shoes
  • ESD workbenches
  • Ionizers
  • ESD bags
  • Static-control accessories

Recommended ESD Products

Two-Layer Rubber ESD Bench Mat

Designed for electronics assembly, PCB inspection, repair and testing workstations.

View ESD Bench Mats

Two-Layer Rubber ESD Floor Mat

Designed for designated static-control floor areas and workstation installations.

View ESD Floor Mats

ESD Wrist Strap and Grounding Cord

Provides a personnel-grounding path when used and tested correctly.

View ESD Wrist Straps

ESD Workbench

Build a complete grounded workstation with an ESD-safe work surface and accessories.

View ESD Workbenches

ESD Gloves

Reduce contamination while supporting appropriate PCB and component-handling procedures.

View ESD Gloves

Ionizer

Helps neutralize charge on isolated conductors and insulating materials that cannot be grounded effectively.

View ESD Ionizers


Build a Complete ESD Workstation

A static dissipative mat is only one part of an effective workstation.

A complete setup may include:

  1. ESD workbench
  2. Static dissipative bench mat
  3. Verified mat ground cord
  4. Common-point ground
  5. ESD wrist strap
  6. Continuous wrist-strap monitor
  7. ESD-safe tools
  8. Grounded soldering equipment
  9. Ionizer where required
  10. Conductive component storage
  11. ESD-safe packaging
  12. Periodic compliance testing

Every element should be selected and verified as part of the same ESD control system.

Static Dissipative Mat FAQs

What is a static dissipative mat?

A static dissipative mat is a resistance-controlled work surface designed to move electrostatic charge toward ground gradually when installed and grounded correctly.

What resistance is considered static dissipative?

The general material classification covers surface or volume resistance from 1 × 10⁴ ohms to less than 1 × 10¹¹ ohms. Specific work surfaces and flooring systems may use narrower operational or compliance limits.

Is 10⁶ to 10⁹ ohms always the dissipative range?

No. That range is commonly used in specific ESD product and application contexts, but it should not be presented as a universal definition for every dissipative material.

Is a static dissipative mat conductive?

It can conduct a controlled amount of electrical current, but its resistance is normally higher than that of a product classified as conductive.

Does a dissipative mat need grounding?

Yes. It normally needs a verified grounding path to remove accumulated charge effectively.

Can I use a dissipative mat without a ground cord?

The mat may not perform as intended without a reliable path to ground.

Is an anti-static mat the same as a dissipative mat?

Not necessarily. “Anti-static” may only describe reduced static generation, while “dissipative” refers more specifically to measurable resistance-controlled charge movement.

Is a rubber mat automatically ESD-safe?

No. Ordinary rubber may be insulating. The electrical properties must be intentionally engineered and verified.

What is a two-layer ESD mat?

It is a mat that typically combines a dissipative working surface with a conductive or lower-resistance backing layer.

Is a two-layer mat better than a single-layer mat?

A two-layer construction can provide a better functional separation between the working surface and grounding layer, but product performance must still be verified.

What thickness should I choose?

A 2 mm mat is suitable for many standard electronics workstations. A 3 mm mat may provide additional cushioning and mechanical durability.

Can a static dissipative mat be used for soldering?

Yes, provided the mat is suitable for the expected heat exposure and normal soldering procedures are followed. Avoid placing extremely hot tools directly on the surface unless the mat is rated for that use.

Can I cut an ESD mat?

Many rubber ESD mats can be cut to size. Cutting should not damage the functional area or prevent proper grounding.

How many ground points does a mat need?

The number and location depend on mat size, workstation design and the approved ESD control procedure.

Can the wrist strap connect directly to the mat?

A wrist strap is normally connected through an approved common-point ground or grounding system. Do not create an improvised connection without verifying the design.

How often should an ESD mat be tested?

Test frequency should be defined by the facility’s compliance verification plan, risk level, use conditions and applicable standards.

What instrument is used to test an ESD mat?

A calibrated surface-resistance or resistance-to-ground meter with appropriate electrodes is commonly used.

Does humidity affect ESD mat resistance?

Yes. Environmental humidity can affect the electrical resistance of some materials.

Can household cleaner damage an ESD mat?

Some cleaners leave an insulating residue or damage the material. Use a cleaner approved for the mat.

Why did my mat fail after cleaning?

Possible causes include cleaner residue, remaining moisture, surface contamination, incorrect testing or material damage.

Can an ESD mat lose its electrical properties?

Yes. Wear, contamination, chemical exposure, aging, heat and physical damage can affect performance.

Can I place paper on an ESD mat?

Paper may interfere with contact between the component and the controlled surface and may have variable electrical properties. Evaluate its use under the facility’s ESD procedure.

Can plastic trays be placed on the mat?

Ordinary insulating plastic may retain charge. Use approved ESD-safe trays where required.

Does an ESD mat protect components inside insulating packaging?

Not necessarily. Insulating packaging may isolate the component from the mat and may itself generate or retain charge.

Can an ESD mat replace a wrist strap?

No. A mat controls the work surface. It does not automatically provide reliable personnel grounding.

Can a wrist strap replace an ESD mat?

No. The operator may be grounded while tools, components or the work surface remain uncontrolled.

Is a floor mat the same as a bench mat?

No. They may differ in construction, resistance requirements, durability, surface texture and system function.

Can a dissipative bench mat be used as flooring?

Only if it has been evaluated and approved for that purpose. Bench mats are not automatically designed for floor traffic.

What color is best for an ESD mat?

Color should be selected according to visibility, inspection needs and workstation design. Electrical performance is more important than color.

Are green ESD mats more dissipative?

No. Color does not determine electrical resistance.

Can ESDBEST produce custom-sized mats?

Yes. Custom sizes, rolls, cut sheets, colors, logos and packaging can be discussed according to the project.

Can ESDBEST install grounding snaps?

Grounding snaps and compatible grounding accessories can be supplied according to the confirmed specification.

Can I order a sample before bulk production?

Yes. Sample evaluation is recommended before a large order.

What information should I provide for a quotation?

Provide the mat size, thickness, color, quantity, resistance requirement, application, grounding accessories, logo and delivery destination.

Request a Static Dissipative Mat Quote

Need a static dissipative mat for PCB assembly, electronics manufacturing, laboratories or ESD-controlled workstations?

Send us:

  • Required width and length
  • Thickness
  • Color
  • Quantity
  • Roll or cut-sheet format
  • Resistance requirement
  • Grounding snap requirement
  • Grounding cord requirement
  • Custom logo
  • Packaging requirement
  • Delivery country

ESDBEST Contact

Email: sales2@esdbest.com
Phone/WhatsApp: +86 137 1427 2599

Related ESD Resources

What Is an ESD Mat?

Understand how ESD mats control electrostatic charge and how they fit into a complete ESD control program.

Read the Complete ESD Mat Guide

Conductive vs Dissipative ESD Mats

Compare resistance, discharge behavior, applications and selection criteria.

Compare Conductive and Dissipative Mats

How to Ground an ESD Mat

Follow the correct installation process for snaps, ground cords and common-point grounds.

Read the Grounding Guide

How to Test an ESD Mat

Learn how to perform resistance-to-ground and point-to-point testing.

Read the Testing Guide


Return to the main resource:

ESD Mat for Electronics Workbenches and Floors